Menu / Administration / Lender Details / Basic Details
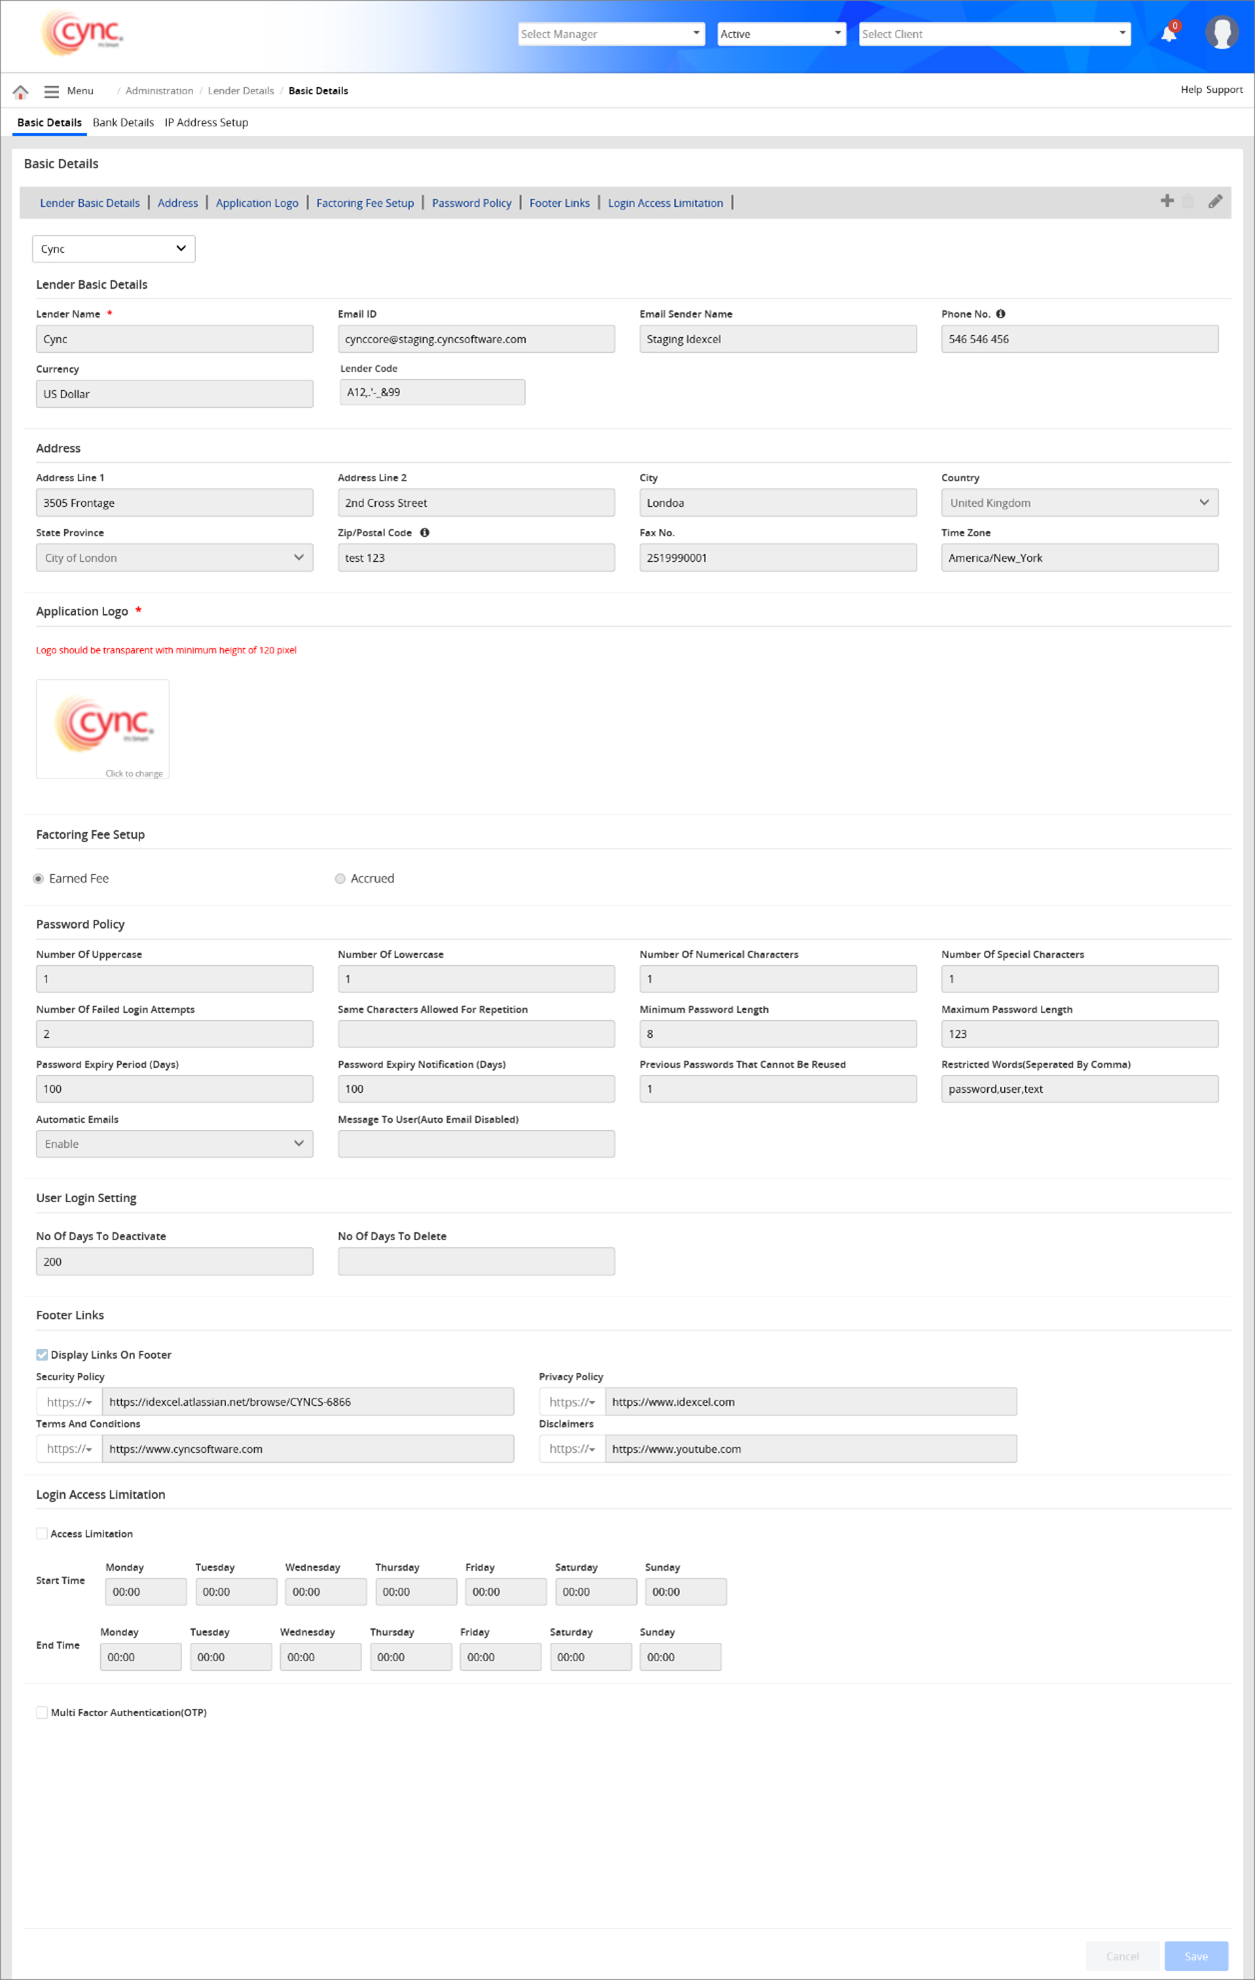
Basic Details
The Lender Details module has two pages, Basic Details and Bank Account Details
The basic details page includes details such as the lender's name, address, company logo, factoring fee setup, password policy, footer links and login access limitation.
Navigation: Menu → Administration → Lender Details → Basic Details
The bank account details include the bank account details used for transactions.
Refer to the screenshot:
Lender Basic Details
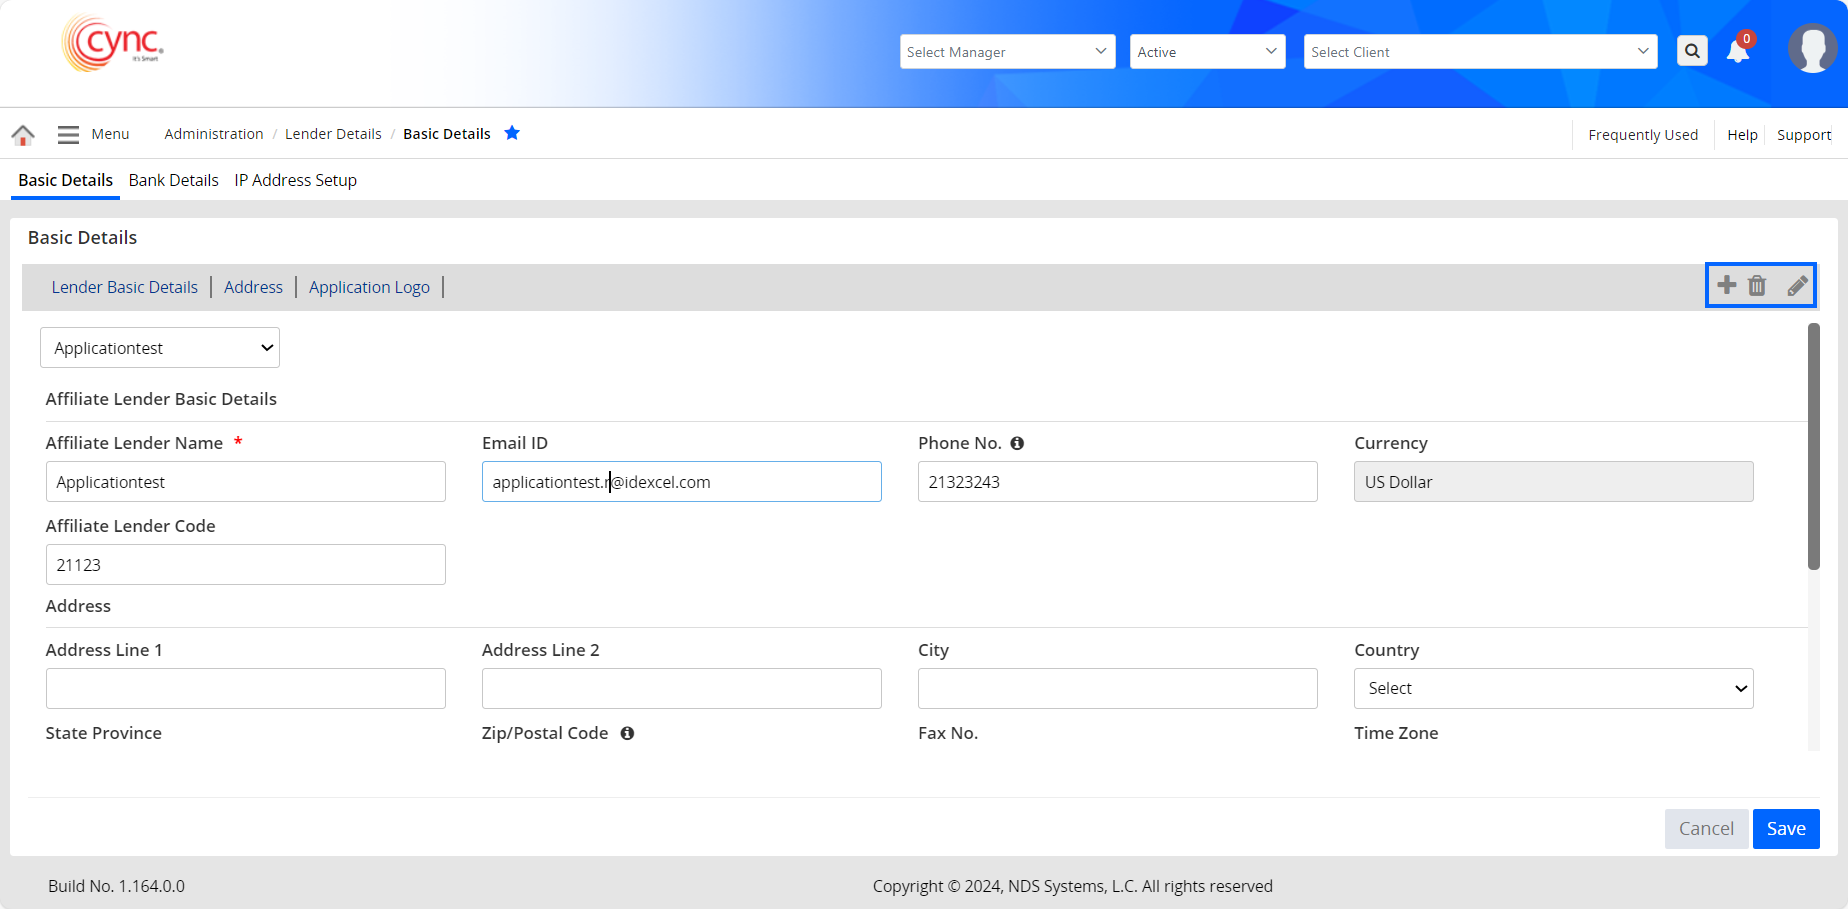
The section shows the main lender details such as lender name, e-mail ID, and phone number. You can also create an affiliate lender for the main lender.
To add a new Affiliate lender, perform these steps:
1. Click the  button
2. In the Lender Name field, enter the affiliate lender name.
3. In the E-mail ID field, enter the e-mail id.
4. In the Email Sender Name field, enter the email sender name. This field is optional.
 The value entered in this field will be used as the sender's name for all the outgoing emails. If the Email Sender Name field is not filled out, then the email ID will be shown as the sender’s name for all the outgoing emails.
5. In the Phone No. field, enter the phone number. The maximum character limit is 30. Alphabetic characters are not allowed. Special characters such as ( , ) , +, - and spaces, are allowed.
6. in the Currency field, select the currency.
7. In the Affiliate Lender Code field, enter the affiliate lender code.
Whenever the user tries to save the affiliate lender code which does not start with an alphanumeric character and includes a special character other than those mentioned, the system shows an error message: “Affiliate lender code can only start with an alphanumeric character and have following special characters: .’-_&”.
Refer to the screenshot:
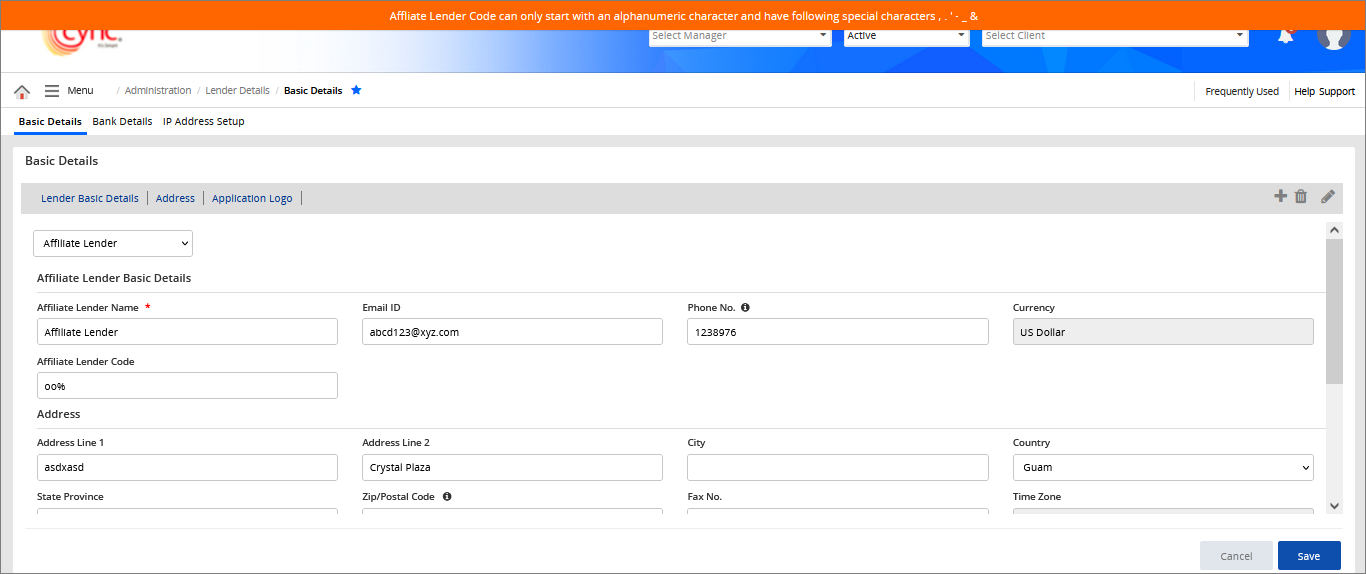
8. In the Address Line 1 field, enter the address.
9. In the Country drop-down, select the country.
10. In the State Province drop-down, select the state.
11. In the Zip/Postal Code field, enter the postal code. The maximum character limit is 10. Only special characters such as hyphens, spaces and alphanumeric values, are allowed.
12. In the Fax No field, enter the fax number.
13. In the Time Zone drop-down, select the time zone.
14. Click the Application Logo section and upload the logo of the affiliate lender.
15. click the ![]() button or the
button or the  button to cancel the action
Users can add new lender details based on the permissions provided under the Roles & Permissions page.
Once the affiliate lender record is saved, you can edit or delete the lender as required.
The created affiliate lender is available under the Client Basic Details page. You can select the Affiliate lender for a particular client as required.
Refer to the screenshot:
The fields are constrained by the character limit. You are likely to encounter field validation issues if the character limit in any of the fields exceeds the allowed limit.
Address
This section includes the complete postal address of the lender.
Application Logo
This section includes the lender's company logo.
Factoring Fee Setup.
This section shows the type of factoring fee, such as earned or accrued. If you select the fee setup as earned, the amount from the lender's cash reserve decreases every day.
During funding, the earned fees are deducted from the advance amount of the client.
If you select accrued as fee setup, the amount is accumulated over a while and the same decreases from cash reserve.
Password Policy.
Once a lender is created, the system sends out an e-mail.
Clicking on the link will take the user to the Cync login page.
Users can create a password and continue to use the application. The users have to follow a password policy while creating or updating a password.
See also: Password policy.
Refer to the screenshot: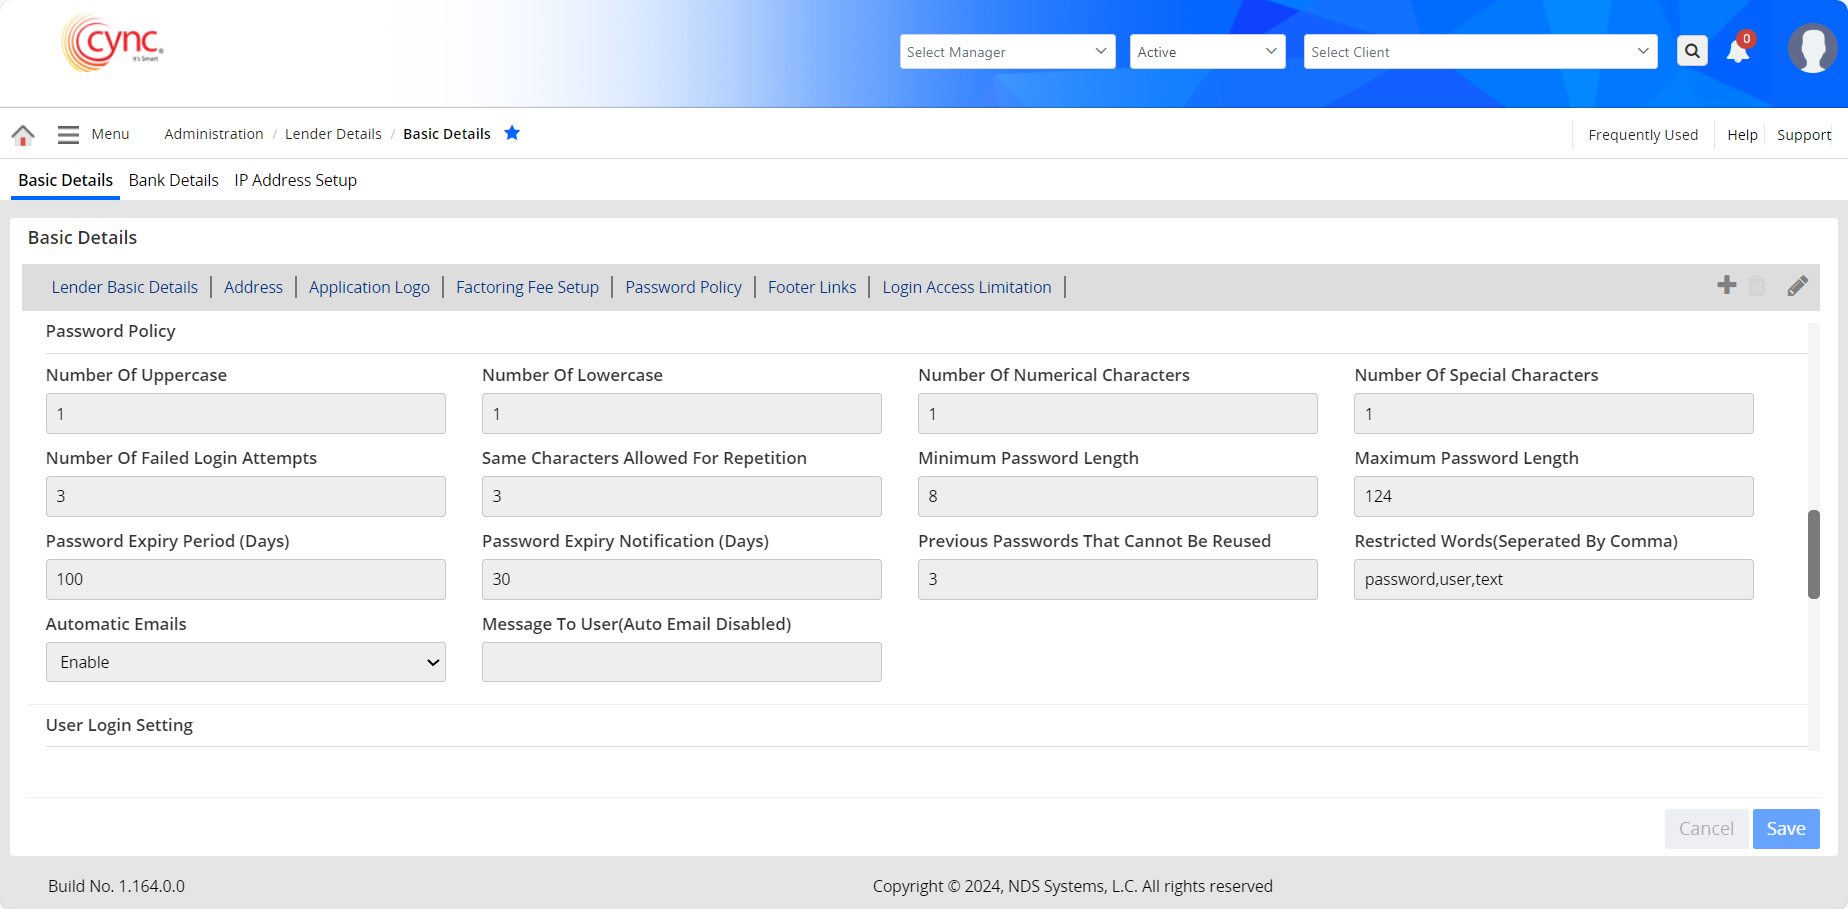
Automatic Emails.
The Automatic Emails option allows the lender or administrator to unlock the account of the users.
The user account gets locked after the defined number of failed login attempts.
When the user account is locked and the Automatic Emails option is enabled, the system automatically sends an e-mail to the respective user to unlock the account.
In this case, the Automatic Email option under User List is also enabled.
When the user account is locked and the Automatic Emails option is disabled, then the user can add a specific message with an e-mail id under the Message to the User text box.
When the respective user clicks the Forgot Password link, the system displays the same message on the Login page.
Later, the respective user can send an email to the administrator. Upon receiving the email, the administrator then sends an activation e-mail link to the user from the User List page.